Sunday 17 January 2016

Fortune Island: Rustic and exquisite!

Everyone's been going crazy over this island because of the Grecian pillars and statues. Since then, I've desired to come see this island myself and be amazed! And so, January 16 2016, my group and I decided to give this island a go!

Fortune Island is an island owned by the Levistes. It is an island found off of the coast of Nasugbu, Batangas. This island used to be a resort but got abandoned after some time. (I forgot to ask why) So the remnants of what used to be are still there, the main lobby, some huts, rooms and cottages. Not knowing what to do with it for now, the Levistes are renting it out to resorts nearby, which allows us visitors access to this nice island. 


Rocky shoreline, low tide, 10am

White sand beach! Oh Yeah!


HOW WE GOT THERE:


3 days before going there, I contacted Nanay Sarah (09394895292) and she arranged the boat and resort requirements for us. Basically, she's the "middleman". In other blogs, they ask you to call Mang Dante, well Nanay Sarah is Dante's wife, so you'll get the same number. She charged us P3000 (6 people) for the boat ride to and from the island. I found this very expensive but decided to push through with it since Kuya Chris' number (also found in other blogger websites) can't be contacted for reasons unknown, then. 

**I'll present the alternative on getting there shortly.**

We left Manila around 4am, picked up our other relatives in Calamba around 5am and arrived in Nasugbu around 8am (we went through the Lipa-Lemery route which is actually longer than the Sto.Tomas-Tagaytay route). It took us about 3 hours to get there from Calamba because of the longer route. So for those driving, take the Sto Tomas-Tagaytay route. It could be much faster since it's shorter and there isn't much traffic around that time yet. 


We drove to Nasugbu and met with Nanay Sarah at Jollibee. Upon meeting with Nanay Sarah, she led our group to Brgy. Bucana, where a lot of other resorts are. That's where you'll find the Korean resort Nanay Sarah is connected to. Take note: Not all resorts in that area offer tours to Fortune Island, it's being offered only in select resorts, one of which is Manangkel (Don't know how to spell it but that's what the boatman told me HAHA, well that's how I heard it). The boat was there waiting for us, all we had to was register. Sign our names up at the resort for safety reasons. There is an entrance fee of P300 for the day tour(as of Jan 2016) per person at the Korean Resort. For an overnight stay, the fee is P400 per person. 

Our boat ride to the island was only for about an hour, since it was a good day according to the boatmen. The boatman also told us that during Dec-Feb is when the waves are usually strong, so some boat rides could take up to 2 hours long per trip. But yeah, we are blessed that the day we decided to go there, the weather was suitable for boat rides!

We stayed until 2pm in the island. The activities we did are listed down there, so read on if you're interested :P

The travel back to Nasugbu was the same, an hour for the boat ride. Then we travelled back to Calamba using the Tagaytay route and it took us longer because of the traffic :P But yeah, you could use either route!

I talked to the boatmen cos I really wanted to go back, but at a cheaper cost. They said that for a group of 12 persons the boat ride to and from the island through a direct transaction with them is P3500. That's a lot cheaper from the P3000 for us 6 people. 

Also, about Kuya Chris' number, according to Mang Loreto Leviste, 
the other caretaker of the island, is 09201231949. He lost his old number found in other blogs. You may call him to inquire about your future visit to the island, he will help you find cheaper alternatives than Nanay Sarah or Tatay Dante's offers. 

Because our boatmen were really courteous and helpful, I took their number so they could help us out again when I come back. If you're interested, call Kuya Marlon (09057843467) for boat reservation and inquiries. 

The easy (and a little more expensive) way to get there is just to book tours with local travel agencies. I know Go PH travel and tours offers it.  (click for the link)

The perks of bringing a car for a day tour: you can leave your valuables and other stuff there (money, jewelry, other gadgets cellphones, change of clothes and toiletries)to keep it from getting wet from the boat ride, in cases where the waves are so strong and if there's rain. Also, keeps it safe from thieves and you'll be able to focus on having fun, since you won't have stuff to worry about. 

FOOD, ACCOMMODATIONS, etc.:
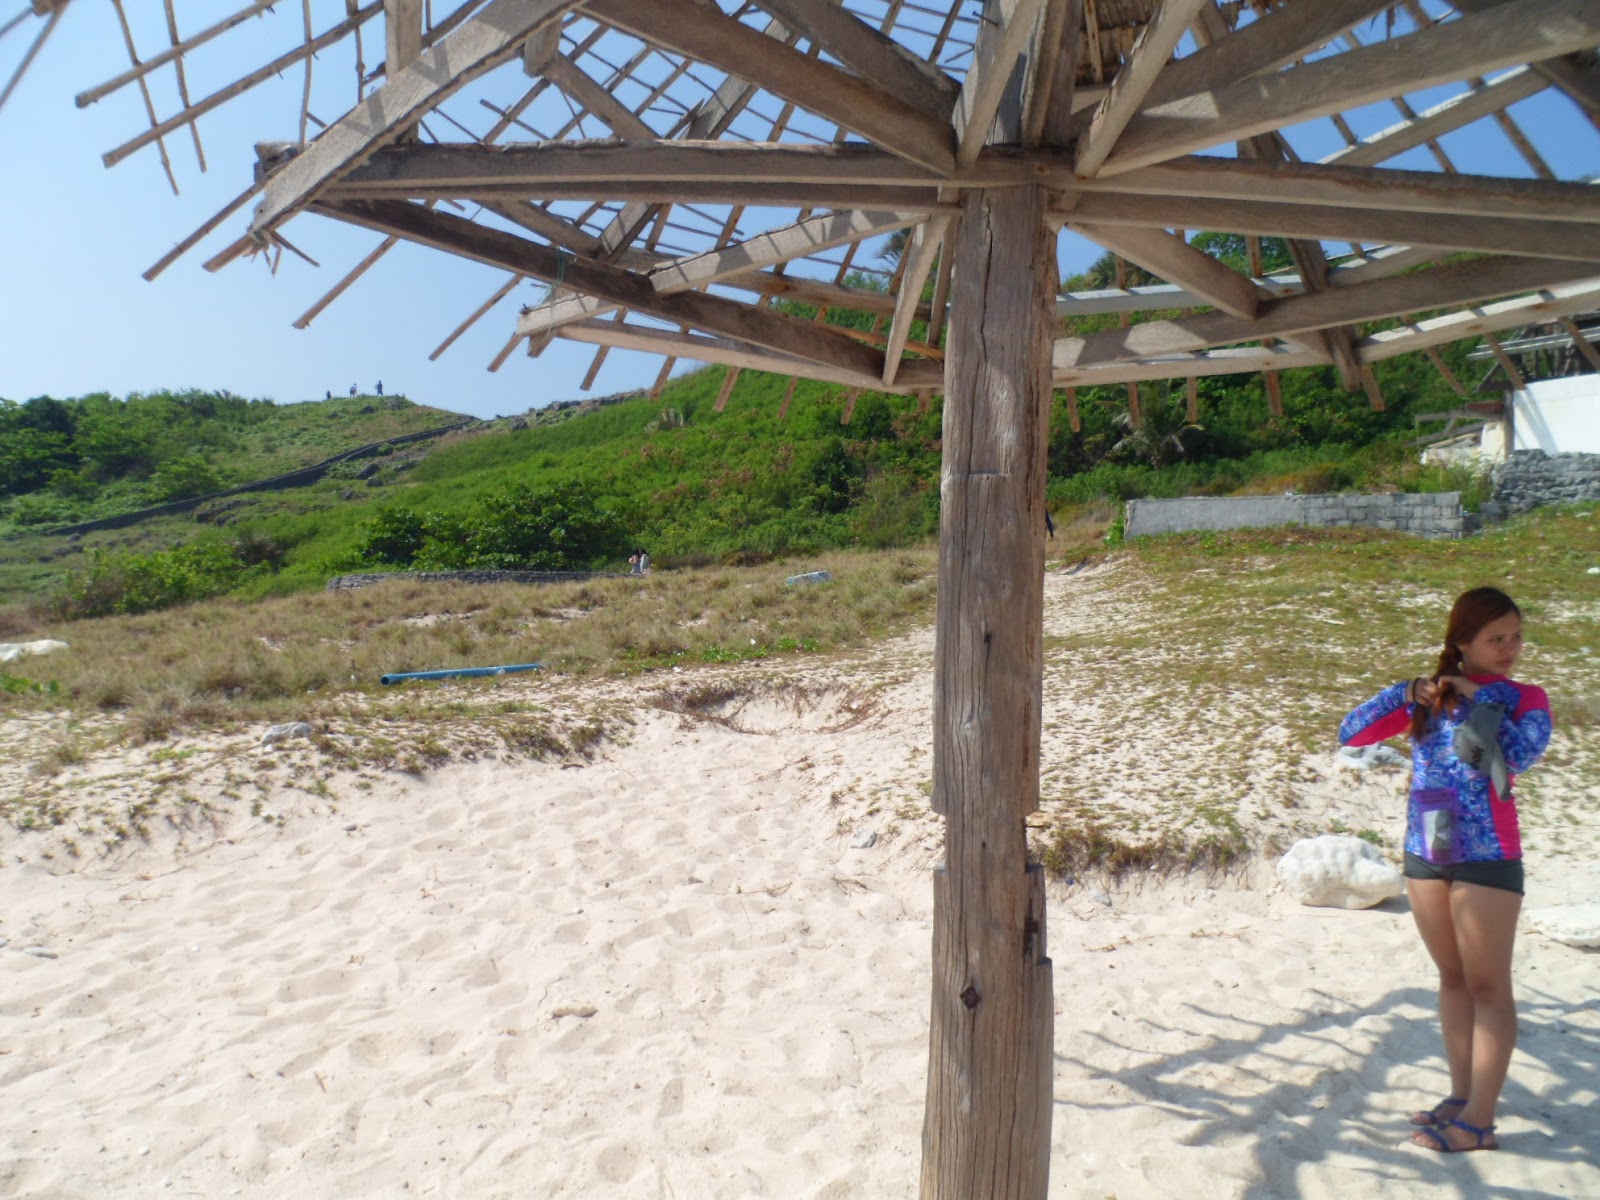
As mentioned in other blogs about the island, there isn't ANYTHING in the island. No huts, cottages, rooms and whatnot! No restrooms either! If you have to do number 2, you're gonna have to rough it outdoors! HA HA! Not sure if there's fresh water, you better ask someone who's stayed overnight.

So it's best to bring a huge umbrella or find a spot where a tree is so you get some shade from the heat. It would also be wise to bring a tent if you're a large group. But for a small or intimate number of people, just bring a banig or malong and find yourselves a tree! Or if you're brave, you could just put your stuff inside the already destroyed main lobby of the Island.


No cottages, no huts, no whatnot!
You could get creative and bring a tarp to cover the top of this little hut to get some shade!
You could leave your stuff here, if you like! It's tiled but there isn't a decent roof .
Now, about food, again, there's nothing on the island. However, when there's a lot of people an ice cream person will be found wandering in the island selling some popsicles! Ha ha! 

So it's best to bring your own food! To save time, you can bring cooked food but if you want to eat fresh, you could also cook it there. There is a grill near the camping area, but it's so messed up already (rusty and stuff) so bring your own grill rack or wrap your food in aluminum foil. Bring your own charcoal, lighter/gas/matches, and of course food! We were lucky enough that our boatmen offered to cook our food for us <3 so less work for us and more time to enjoy God's creations in that island! 

If you find it too much of a hassle to cook, you can just buy food from the supermarkets, carinderia, restaurants and food chains in Nasugbu before going to the resort. they have Jollibee, McDonald's (newly opened at this time, Mang Inasal, 7Eleven, Savemore etc. 

Of course, keep yourself hydrated and bring fresh water with you! A lot of it cos it's really hot out!

You wanna stay overnight? Then bring your own tent, food and make sure you have mosquito repellent. You can camp wherever you like as long as it's a bit of a distance from the shore but there's a camp site, where most people pitch their tent on. Oh and beware of snakes! I saw a lot of snake trails in the sand. Those aren't bicycle wheel marks that you will see on the sand, those are snakes! ha ha!

As for your trash, hand it over to the caretaker either Kuya Chris or Mang Loreto, there aren't any trash bins in sight. They will be the ones disposing of it properly. KEEP your trash in one bag, please. Let's keep nature clean! Care for the island, yo!

OH AND BRING WATERPROOF CAMERA, SUNBLOCK and HATS/CAPS!


Here are the reasons why YOU should come visit this island too! 

1. The Grecian Pillars and statues

For anyone obsessing over Greece, this place is a good start for you! It's accessible to us living in QC or Manila area, well basically anyone living in Luzon. It's cheap and you won't have to worry so much about the cost! There are a lot ways to get there, you can take your own car or take a bus!

We aren't pro at taking pictures but here's some of our shots at that spot! The only Greek looking part of the island is the left side. 


The Grecian columns/pillars found at Fortune Island

Our group! :D

One of the few statues, you'll find at the top

The view from the top! That ocean looks so enticing!
The amphitheater and the view of the pillars from afar


2. The Cliff jumping!

After taking pictures at the pillars and statues, you should walk further up and on your left, you will see stairs that leads you down to the cliff jump. 


This is the walk down the cliff diving spot. It's a tad dangerous so be careful or you might slip and get bruised. 

There's one cliff that's about 8-9 feet high and the other one is about 14-15 feet. It's a lil' scary but it's crazy fun (and maybe some would say butt hurting!!) It's a lot of fun with your friends and family!


This is the 8-9ft cliff jump. The stairs to go back up is located near the wall of the cliff

This is the 14-15ft cliff jump! Amazing view from up here!
There are other spots for cliff jumping around the island, but on this one, there are stairs and ropes that will help you get back up. 

Seriously, this was my first try at cliff-jumping! It was so fun and I wish I could do it again.

Note to first-time cliff jumpers: Keep your body straight and arms up, or one could cover your nose. Make sure you land in the water feet first! 

I had bruising similar to hazing when I landed on my left butt! Ha ha! 

**Click on this link for our Fortune Island cliff diving/jumping video compilation.**

3. Snorkeling near the Cave and Lagoon/Bridge.

Our boatmen offered us snorkeling for P50 per head and we took it. Other boatmen might offer P100 per head but a lil' persuasion and kindness (like offering them lunch :D) will help you get cheaper rates. They brought us to the cave and lagoon I saw while we were on a speedboat (not offered on the island, happened to us randomly, more on this later). Unlike Coron, there's fewer fishes and less colorful corals in the Batangas waters. But yeah there were Angel fishes (Gil from Finding Nemo) The cave was small, you could see the end of it from the entrance. It is inhabited by bats so it smells putrid  and we didn't enter it cause the boatman wasn't confident in going in (although we wanted to. 

I would have taken a picture of myself at the lagoon/bridge but we didn't have an water camera or anything similar, so I don't have a pic while underneath it. 


That's the cave and the small orange thingies is us swimming around it. The lagoon/bridge is on the right

4. Leave your broken slippers (not for broken hearts) at the foot of this tree

While walking around the beach front, we stumbled upon this tree. We were amused because we saw a collection of broken slippers (either a left or a right). 


The tree of broken slippers </3
We were thinking of reasons why those were there. One is that, these slippers could be from the ships that sank around the area and they were stacked there. Another is that, people just thought it would be a great idea to leave their slippers that broke during their stay at the island. My niece jokingly said that if you take one of these slippers, you will be taking someone's spirit with you. (creepy, really)

What do you think could explain this? :D


5. Chillax at the beach
When we were there, there were only a few groups in the island. So it is tranquil and peaceful. You could chill under a tree and sleep (which is what my mom did). Let all your problems drift away even just for a day. 

Island rules, read it!

I hope that every visitor keeps it quiet and peaceful! Don't be too loud when you go there cos it ruins the chillax ambience for everyone! Ha ha!

6. Make NEW friends!

While cliff jumping we made new friends and they let us ride on their speed boat! First time experience for most of us! They were so so generous they took as around the island for free! Thank you Jojo and Mike! You made our stay more fun and exciting! Oh and thanks for letting me drive the speedboat too!


Thank you for taking time to read this blog! Should you have any more questions about the island or our trip, feel free to leave a comment below! Feel free to share this blog too! :D

Wednesday 9 October 2013

Journal # 11: Churros con Chocolate

I love chocolate! Now, who doesn't, right? Churros con chocolate has been one of my favorite rainy day foods. Chocolate is meant to enlighten someone's day and this wonderful combination just brings joy to my heart!

I made churros before and I hate to say this, but, I lost the recipe for it. So I just had to look for another one online. The wonderful thing about churros is it's very easy to make. 

Be sure to follow the exact measure of the ingredients or else the dough will be either too wet/sticky or too dry. 

Got this simple and wonderful recipe from BBC!
Although, I omitted the ingredients that I did not use and added some ingredients too.

Churros
Ingredients:
100g unsalted butter
200ml cold water
175g flour
1/4 tsp baking powder
3 large eggs, beaten
1-2 tbsp of icing sugar, for sprinkling

You start with sifting the flour and baking powder together. Then, combine the water and butter together on a small saucepan. Set it on medium-high heat and let it boil. The moment it boils take it off the pan and add the flour mixture to it. 

Beat it with a wooden spoon until combined well. Let it cool for a bit then add the beaten eggs one at a time. Beating well after each addition. Beat it until smooth and it comes off the sides of the bowl.

Let the mixture cool and set it aside. Make sure it is covered with cling/plastic wrap or maybe a towel, just to keep the moisture in. 

After letting it sit a while, start heating up your deep fryer. To make the churros, use a pastry bag with a jumbo open star tip. Cut them with scissors to the size you want. Fry for 1-2 minutes.

As for the chocolate sauce, this is the one that I've been using. It's a recipe that I can call my own. It's rich in chocolate flavor and isn't too sweet. 

Chocolate Sauce:
Ingredients:
1/4 c. Butter (add more or less depending on the consistency you like)
125g Bittersweet Chocolate (or dark chocolate)
Milk, at room temp (optional)

All you have to do is to put the chopped chocolate in a bowl and set it on a pan with boiling water, let the butter and chocolate melt and stir it up. Adding the milk will help with the consistency you want. :)


Jumbo Churros con Chocolate! c/o my instagram
Feel free to follow me on instagram (@penny4thots) for some pics of the food I make. Also find us on Facebook, @King's Crust fan page. 

Feel free to write on my tab below! :)

Wednesday 2 October 2013

Journal # 10: I see red everywhere!

Red velvet anythings are trending nowadays, so I decided to jump in the bandwagon and make some other kinds of red velvet baked stuff. 

Customers have always loved my red velvet cake, so I wondered what the feedback would be if I included some red Velvet sandwiches to our King's Crust menu. 

I was supposed to make red velvet crinkles but then the consistency was too runny so I decided to still make them cookies in looks.

I made a cream cheese filling along with it, to make it an actual sandwich.I dunno why I'm sharing this recipe but yeah, they're actually that good. Haha Like miniature cakes but a little stronger. Moisture was kept inside too.
Cookies are red, violets are blue...how does it go again?

Red Velvet Sandwiches
Makes 36-40 cookies

Ingredients:
1 cup white sugar
1/2 c. butter
1 large beaten egg

2 cups flour (+1/4 if you think it's a little runny)
1/2 tsp. baking soda (a little more wouldn't hurt)
1/2 tsp salt

2 oz. melted unsweetened chocolate
1/3 cup milk (or buttermilk)
2 oz. Red dye
1 tsp vanilla

As for the filling, you can use any cream cheese frosting recipe you have. 

I preheated my oven to 350deg F. Then I sifted the flour together with the salt and baking soda. The recipe calls for only 1/2 tsp. but you may add a little more if you'd like. 

I creamed the butter then added the sugar until it became a little light and fluffy. I added the beaten egg last. 

I added the melted chocolate, vanilla, red dye and milk to the butter mixture. 

After all the wet ingredients are fully incorporated, I added them to the dry ingredients. Be sure not to over beat. 

Now, if you look at your batter and you think that it's a little runny, you may add a little more flour. 

Scoop them into an oiled cookie sheet. Then put them in the oven at 350F for 8-10 mins.

Let it cool and then frost it with your favorite cream cheese frosting.

As always, I let my bf be the judge of my cooking and he loved it! Not because he was biased towards me! HA ha! But yeah, he did love 'em! So i let him take half the sandwiches home! 

4Ts: Time to taste test!
Like what you read? Questions? Comments? Give me a shoutout in the comments! :) 

Thursday 7 February 2013

Journal # 9: Pass that Pasta!

My first post for February! Yey! Enough celebration, let's talk food! :)

Ever since I had the time to cook, I've always wanted fresh everything. Freshly made pizza, bread, cookies, fresh everything! I've always wondered about how to make fresh pasta. I've watched Masterchef US people do it and it didn't seem difficult. I love pasta, BTW! 

Pasta is one of the best gifts the Italian people shared with the world! So here I am, going to share with you a recipe that I have tried and love! 

Here's a teaser first:

After maybe 1 1/2 hours of prep and cooking here's the result:
Looks good, right?
Okay, before I tell you what's inside those magical ravioli. Let's talk about how I made them.

Making the Ravioli
Once again, I used Laura Vitale's Pasta Dough recipe! I love watching her vids, it's really helpful and entertaining! Be sure to check out that link. 

Some helpful tips for newbies out there:

1. Be resourceful
Laura's recipe requires a food processor, however I don't have one and maybe I'm not planning on getting one. SO I just mixed them manually by hand, I just made sure the eggs were beaten prior to me mixing them. Mix until the ingredients are well distributed. 

Remember, you don't have to have all the fancy equipments those Chefs have, you just have to know what they do and you can try and copy that to your recipe. 

2. Be Patient. 
You have to chill it in the fridge for 30mins. So prepare the other ingredients for the filling and the sauce. 

To tell you it wasn't as EASY as I thought it would be. Flattening the dough without a pasta roller is tiring! It takes A LOT of time too!I am an impatient girl, so this was tough for me and I was getting hungry. LOL

I started with a rolling pin and just laid it on my counter like I would any other dough. So I rolled it out until it was maybe 1cm thick (about 10pcs of bond paper stacked). It took me literally 15 minutes to get it right. It was tough for me, cause the dough kept sticking on the rolling pin. So make sure you FLOUR it from time to time. If you over-flour it, the pasta will become really tough.

Then I used a dough cutter to get the shapes I wanted. I made a square and a round one. For your ease, you can use a set of cookie cutters for great looking ravioli. 

3. Well...actually...you should...Yeah, there's supposed to be a number 3, but I can't think of another one. Ha-ha! Hope those two suffice. 

Moving on to our recipe.

Filling the ravioli
I prepared 3 kinds of cheeses for my ravioli and some basil, spinach, garlic, and meat to go with it. 

Popeye's favorite:
1. 1/2 c. of Cottage Cheese: if they come in tubs, make sure to drain them prior to usage, so that the pasta won't be too wet. It would be difficult to seal them.
2. 1-2 tsps. of Fried Garlic Bits: You can buy them from the store or make them on your own, just don't burn them.
3. 10 pcs. Spinach Leaves: Now you see why Popeye likes this! :) Fresh and rinsed. You could alternate basil with these.
4. 1/2 tsp. White Pepper: 

Mighty Meat-y:
1. 1/2 c. cooked ground beef (seasoned with salt and pepper)
2. Goat's cheese: I love its mild flavor. :)


To make 10 Ravioli (Good for 2 persons)
You need: 1/3 of the Pasta dough recipe + One of the filling recipes above.
Cook the ravioli in boiling water with salt and oil for about 8-10 minutes. Check the consistency of the pasta at 8mins. (cooking time depends on the thickness of the pasta you made.)

It's NOW time to make the dressing/sauce for it.

It was undeniably delicious!
For my family, I made some fresh pesto (from the basil and spinach leftovers) and some tomato sauce.

This picture really makes me hungry. Don't tell me that you didn't salivate over that because I know you did!

Use your favorite red sauce recipe, the one that you normally use for spaghetti.

Here's what the fresh pesto with ravioli looks like.
Vegetarian version: Pesto dressing and Spinach filled Ravioli

This pesto is just olive oil, basil, spinach and a bit of salt. Just use a hand held blender and mix em up until you get the right consistency and flavor. Don't over blend it. It might become paste. :))

Over all, my family and boyfriend, oh and my sister's "friend" enjoyed the wonderful meal!


Fresh pasta really tastes different from the ready made ones. I don't know, maybe it's just psychological but so what! It's better cause it was made by me with lots o love and nothing beats that! Ha ha!


Hope you enjoyed reading! God bless! :)


Monday 28 January 2013

Journal # 8: Je t'aime Pizza!

I am a pizza lover and who isn't? right? It's the one thing that I could eat for everyday and not get satiated. It is no surprise to know that pizza is made and served in every country in the world.

I found Laura Vitale in youtube and watched her video on how to make pizza dough and it's just wonderful! I never thought making pizza dough would be this easy! Really! Even newbies can try making it and not fail. 

I just used the dough for this recipe and the rest of the stuff are mine. 

Just a tip: when using recipes with yeast, an envelope/packet means 2 1/4 tsp. of yeast. Don't put in the yeast in the water if it is not the right temperature! It will kill the yeast and won't let your dough rise. Total disaster!

Also, when I made her recipe, I think it had too little salt in it. So I doubled the salt from 1 tsp. to 2 tsps. 

Make sure to follow her instructions strictly (except for the tweak I made) and use this for your tomato sauce

Pizza Sauce:
1 1/2 cups of tomato sauce
6cloves garlic
2 tsps. Italian Seasoning (if you don't have any, dried basil leaves will do)
Salt and Pepper (to taste)

This will be good enough for the dough you made. Use a garlic press to crush the garlic really fine. Add it and the rest of the ingredients to the tomato sauce. 

Don't make it too salty because the cheese (any kind) will help with the saltiness.

I used sliced ham, green olives, mozzarella, cheddar and goat's cheese for the toppings. It turned out really well.

Then bake it for 17-20mins. at 375F. 

Voila! You are now an official pizza maker! Be sure to keep her dough recipe! It's just wonderful! But I'll try out some other recipes, maybe there is something even better!